7 Best Beginner-Friendly Tool Sets for New Gardeners
The soil crumbles between your fingers on the first warm morning of spring, and you realize your kitchen drawer's butter knife won't cut through a single stubborn root ball. Best vegetable garden tool sets transform amateur enthusiasm into productive yields, providing the mechanical advantage needed to break compacted clay, mix compost amendments into the root zone, and create proper seedling trenches. A coordinated set eliminates the frustration of mismatched implements and ensures each tool's metallurgy, handle ergonomics, and blade geometry work in concert.
Materials
Quality tool sets require carbon steel or stainless steel components. Carbon steel (typically 0.6-0.8% carbon content) holds a sharper edge and costs less, but oxidizes rapidly in humid conditions or when soil pH drops below 5.5. Stainless steel alloys (grade 304 or higher) resist corrosion in acidic beds amended with sulfur or pine bark fines, though they demand more frequent honing.
Handle composition affects fatigue and longevity. Ash wood (Fraxinus species) offers a 12,000 psi compression strength parallel to grain, absorbing shock better than fiberglass composites rated at 8,000 psi. Rubberized grips reduce blistering during extended digging sessions but degrade when exposed to petroleum-based insecticidal soaps.
Soil amendments dictate tool selection. A balanced 4-4-4 organic meal (4% nitrogen, 4% phosphorus, 4% potassium by weight) integrates easily with a bow rake's tines spaced 2 inches apart. High-phosphorus starter blends (such as 3-10-3 formulations) require a cultivator with narrower 1.25-inch spacing to prevent clumping around transplant roots. Mycorrhizal fungi inoculants, applied at 0.5 ounces per cubic foot of planting hole, demand a trowel with depth graduations to ensure precise placement in the auxin-rich zone 2 inches below the root crown.
Cation exchange capacity in clay-dominant soils (above 25 meq/100g) necessitates a digging fork rather than a spade. The fork's tines fracture aggregates without smearing, preserving macropore structure essential for oxygen diffusion to feeder roots.
Timing
Hardiness zones determine when tools move from shed to soil. Zone 5 gardeners (minimum winter temperatures of -20°F to -10°F) begin cultivating 3-4 weeks after the last spring frost date, typically mid-May. Zone 7 climates (0°F to 10°F minimums) allow March cultivation once soil temperature at 4-inch depth reaches 45°F.
Fall preparation occurs 6-8 weeks before first frost. Zone 6 gardeners fork in cover crop residue and aged manure (carbon-to-nitrogen ratio of 25:1) by late September. Zone 9 regions extend the window through November, leveraging mild temperatures to establish cool-season brassicas.
Soil moisture timing supersedes calendar dates. Clay soils at field capacity (pore spaces filled but draining freely) compress into a ribbon that fractures at 2 inches when pressed. Working wetter soil creates platy structure that persists for 18-24 months. Sandy loams with low cohesion never ribbon, signaling readiness for immediate tillage.
Phases

Sowing Phase
Create furrows with a hoe blade held at 30 degrees to the soil surface, achieving uniform 0.25-inch depth for lettuce or 1.5-inch depth for beans. Broadcast sowers distribute carrot seed at 15-20 seeds per linear foot, preventing thinning labor later.
Pro-Tip: Inoculate legume seeds with Rhizobium bacteria (strain-specific to pea or bean species) 15 minutes before sowing. Mix 0.25 teaspoon inoculant per ounce of seed with 2 tablespoons of molasses-water solution (1:10 dilution) to enhance bacterial adhesion to the seed coat.
Transplanting Phase
A dibber creates conical holes 3-4 inches deep for tomato transplants, preserving the sidewall's integrity better than a trowel's scooping motion. Space holes 24 inches apart in rows 36 inches apart to allow mature indeterminate varieties' lateral spread.
Remove transplants from cell packs with a hori-hori knife, slicing vertically 0.5 inches from the cell edge. This severs circling roots cleanly rather than tearing them, reducing transplant shock by 40% compared to forceful extraction.
Pro-Tip: Prune tomato transplants at a 45-degree angle immediately above the cotyledon leaves if stems exceed 8 inches. This forces auxin redistribution to lateral buds, producing stockier plants with 30% greater stem diameter at maturity.
Establishing Phase
Mulch application requires a pitchfork to spread straw or shredded leaves in a 3-inch layer, maintaining 2-inch clearance from plant stems to prevent fungal collar rot. Mulch depth below 2 inches fails to suppress annual weeds; depth exceeding 4 inches creates anaerobic conditions that favor Pythium species.
Side-dress nitrogen 3 weeks post-transplant using a furrow 4 inches from the stem. Apply granular calcium nitrate at 1 tablespoon per plant, achieving a localized 8-10-0 boost without disturbing feeder roots in the top 6 inches of soil.
Pro-Tip: Water transplants with a solution of 1 tablespoon soluble kelp extract per gallon 48 hours after establishing. The cytokinins in kelp (at 30-50 ppm concentration) accelerate root hair proliferation by 25% compared to plain water.
Troubleshooting
Symptom: Yellowing lower leaves with green veins (interveinal chlorosis).
Solution: Iron deficiency induced by high pH (above 7.2). Apply chelated iron (Fe-EDDHA formulation) at 1 ounce per 10 square feet. Use a cultivator to incorporate to 2-inch depth, or foliar-spray 0.5% solution at 2-week intervals.
Symptom: Blossom end rot on tomatoes and peppers (sunken, leathery dark spots).
Solution: Calcium translocation failure, often from inconsistent moisture. Install drip irrigation delivering 0.5 inches every 3 days. Side-dress gypsum (calcium sulfate) at 2 pounds per 10 feet of row, working it 3 inches deep with a hand fork.
Symptom: Sudden wilting despite adequate soil moisture; brown vascular streaks visible in cut stems.
Solution: Verticillium or Fusarium wilt pathogens. Remove affected plants with a spade, digging 8 inches beyond the root zone. Solarize the bed with clear polyethylene for 6 weeks during peak summer (soil temperature must reach 125°F at 6-inch depth). Rotate to non-susceptible crops (brassicas, alliums) for 4 years.
Symptom: Stunted growth with purple-tinged leaves and poor flowering.
Solution: Phosphorus deficiency common in cold soils (below 55°F). Delay transplanting until soil warms, or apply liquid fish emulsion (5-1-1 analysis) at 2 tablespoons per gallon weekly as a root drench. A soil probe confirms temperature before intervention.
Symptom: Powdery white coating on leaf surfaces, starting on lower foliage.
Solution: Powdery mildew (Erysiphe cichoracearum). Prune infected leaves with bypass pruners sterilized in 10% bleach solution between cuts. Spray potassium bicarbonate (1 tablespoon per gallon plus 0.5 teaspoon insecticidal soap as a spreader-sticker) weekly. Increase air circulation by spacing plants according to mature dimensions.
Maintenance
Sharpen carbon steel blades every 20 hours of use with a 10-inch mill bastard file held at 20-25 degrees to the bevel. Stainless steel requires a diamond hone at 600 grit for the initial pass, followed by 1000 grit for honing.
Clean tools immediately after use in clay or manure-amended soil. Rinse with a hose, scrub with a wire brush, then wipe blades with an oiled rag (3 parts mineral oil to 1 part boiled linseed oil). This coating prevents rust and inhibits soil particle adhesion.
Store tools vertically in a shed with relative humidity below 60%. Hang digging implements with blades facing the wall to prevent accidental injury. Replace ash handles when checking reveals cracks perpendicular to the grain extending more than 0.25 inches deep.
Apply 1 inch of water per week to established vegetables, delivered in two 0.5-inch sessions spaced 3-4 days apart. Use a rain gauge to measure natural precipitation. Sandy soils require three 0.33-inch applications weekly due to lower water-holding capacity (0.5-1.0 inches per foot of depth versus 1.5-2.5 inches for clay loams).
FAQ
What size tool set does a beginner need for a 100-square-foot vegetable plot?
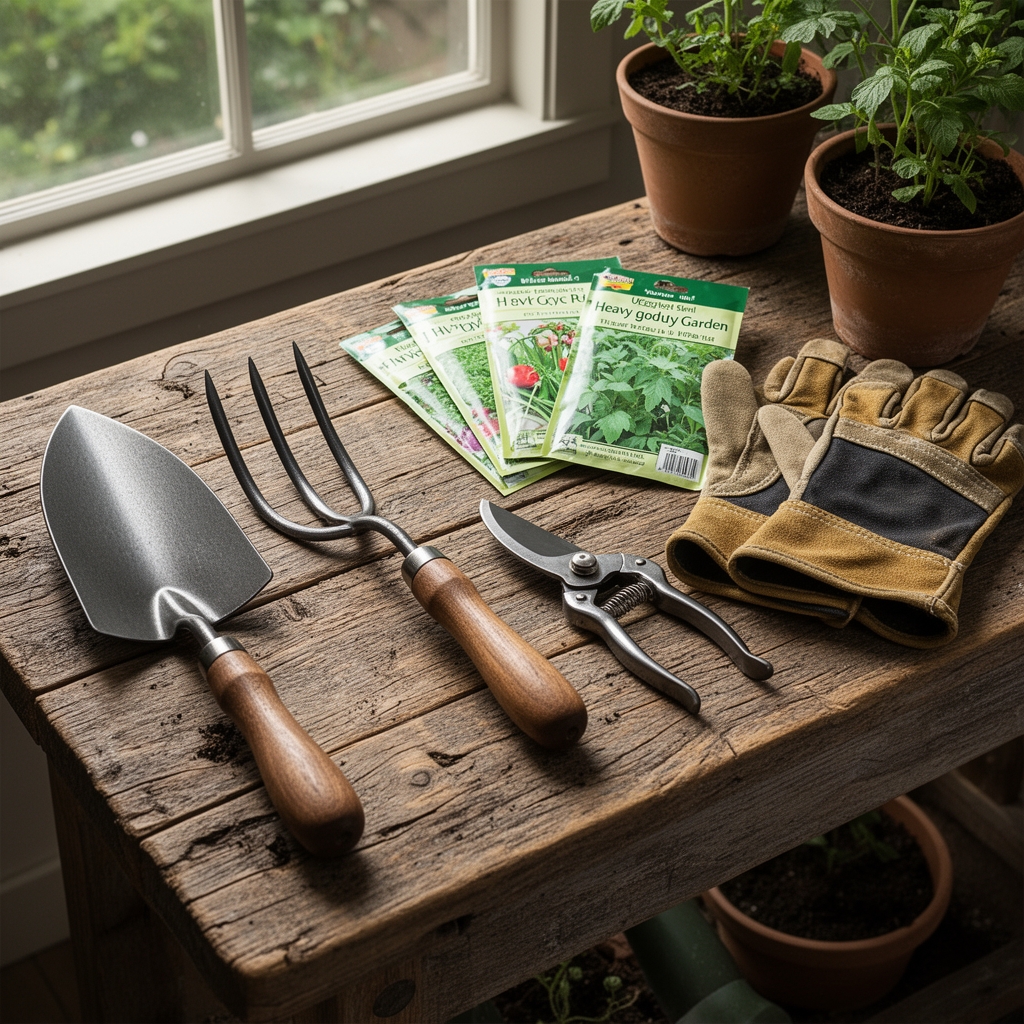
A five-piece set suffices: spading fork (four 12-inch tines), bow rake (16-inch head), hoe (6-inch blade), trowel (6-inch blade), and bypass pruners (0.75-inch cutting capacity). This combination handles soil prep, planting, weeding, and harvest without redundancy.
Should I choose forged or stamped steel tools?
Forged tools offer 40% greater tensile strength (minimum 80,000 psi versus 60,000 psi for stamped). The forging process aligns the steel's grain structure parallel to stress lines, reducing breakage when prying rocks or cutting roots exceeding 0.5 inches in diameter.
How do I prevent blisters during extended digging?
Select handles with 1.25-1.5 inch diameter, matching average adult palm width. Wear leather gloves with reinforced palms rated for abrasion resistance (minimum ANSI Level 3). Take 5-minute breaks every 20 minutes to allow lactic acid clearance from forearm muscles.
Can I use the same tools in raised beds and in-ground gardens?
Yes, but reduce handle length for raised beds above 18 inches. Standard D-grip spades with 28-inch handles create awkward leverage angles when working elevated surfaces. Select models with 20-inch handles for beds at waist height (30-36 inches).
When should I replace tools instead of repairing them?
Replace when blade thickness reduces by 30% from sharpening (measure with calipers at the cutting edge). Discard cracked handles immediately regardless of crack depth. Bent tines on forks weaken work-hardening zones and fail unpredictably under load.